Local settings (connected with Ethernet)
Login
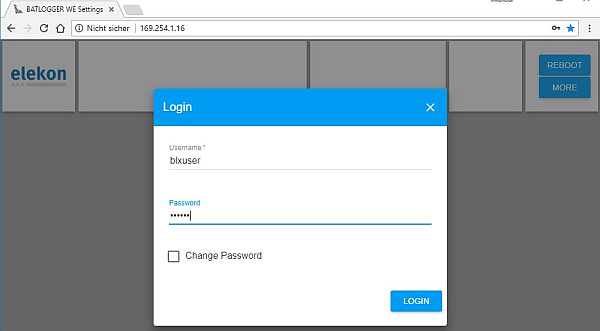
Use a browser (Firefox / Chrome) and type as address
http://169.254.1.16
Login with the following default credentials
Username: blxuser
Password: blx!WE?
If you want (and you should, before you install the BATLOGGER in the field) you can change the default password to your own password by ticking the Change Password box. But that is not important for now.
You can save the credentials in your browser which makes it easier to access the BATLOGGER in the future.
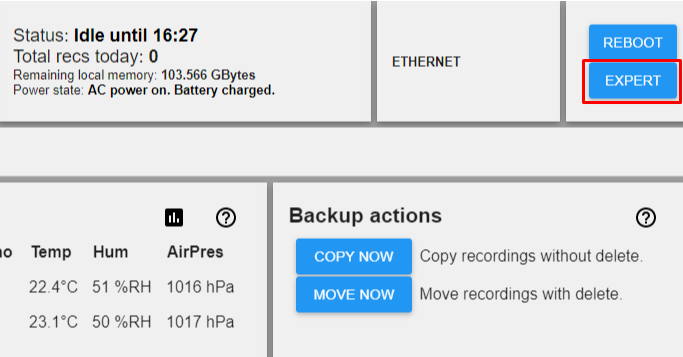
Status
Now you will see the local status page of the BATLOGGER
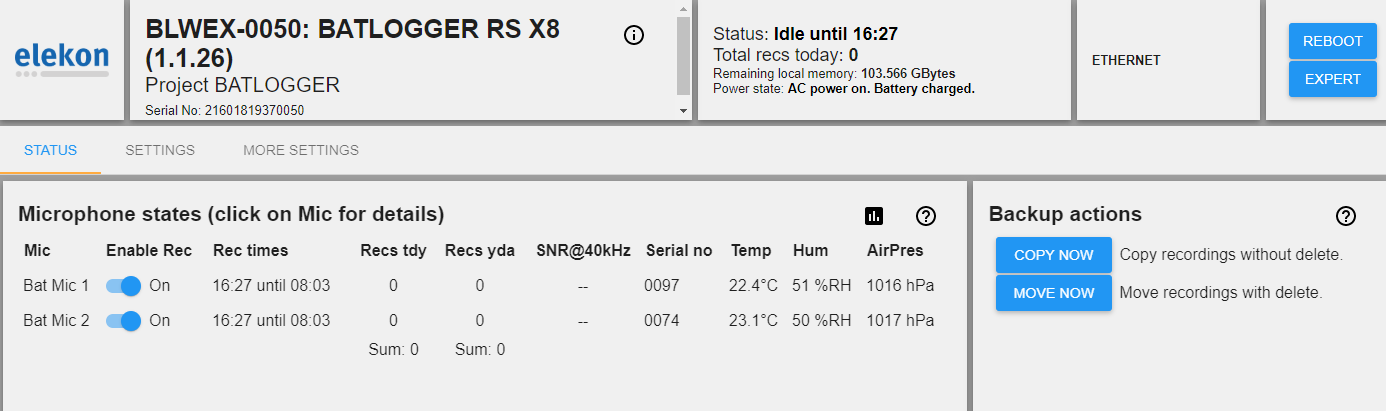
To set the desired connection type, click on Settings in the BATLOGGER settings page.
Settings
Settings here are only saved when you click on SAVE.
Only the Interface Settings need a reboot after change to take the changes into account.
Click on ? to get additional hints on the respective setting.
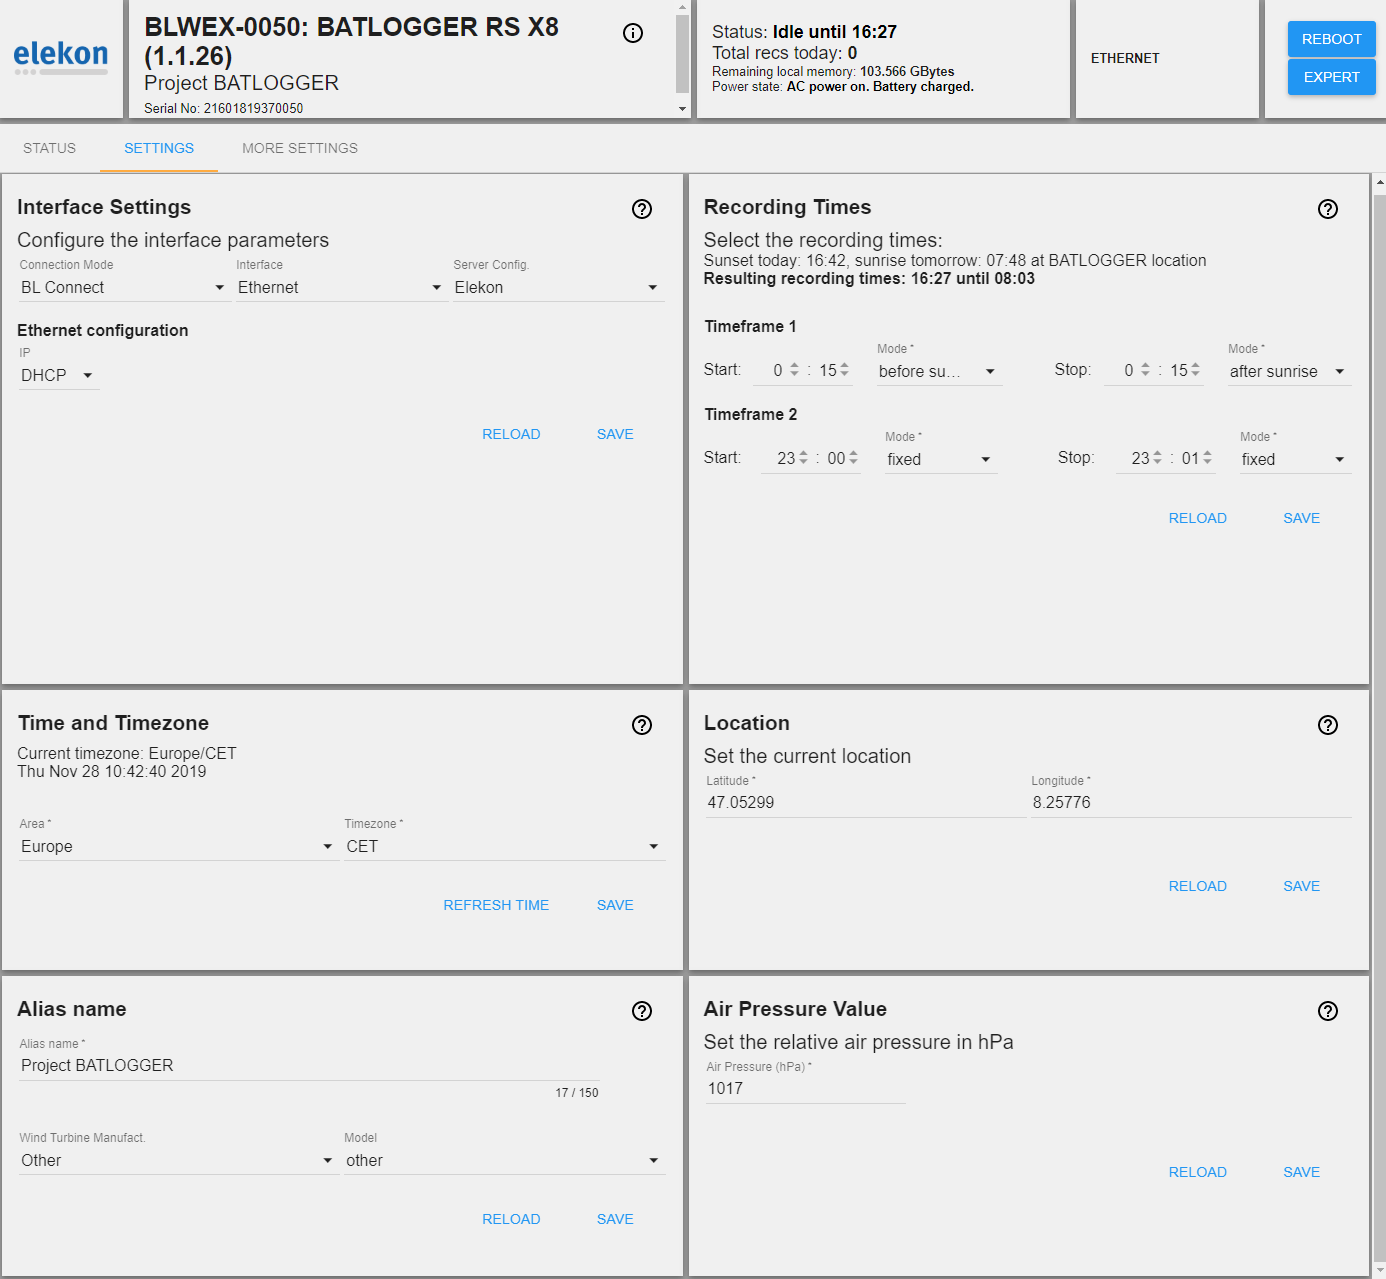
Interface Settings
This setting determines how the BATLOGGER connects to the internet. Verify and change the interface settings as needed to provide the BATLOGGER internet access.

By clicking the ? you get a few additional hints for the settings.
After having set your interface parameters, please click SAVE.
- Keep the “Connection Mode” as “BL Connect”. This enables status monitoring with the BL connect service.
- Keep the “Server Config” as “Elekon”
- Use the “Interface” parameter to set the way the BATLOGGER connects to the internet.
By default, the internal LTE Module is selected and correctly configured for the Elekon SIM card.
Use ETHERNET if you want to use your own infrastructure to provide internet to the BATLOGGER.
E.g. when you are using your own DSL- or Fibre-router.
Make the required changes here. Usually, the BATLOGGER will retrieve its IP address automatically from the router by using DHCP.
So, this is the most common setting for an Ethernet connection to a router
If necessary for special infrastructures, you can also specify a static IP address. Connect your BATLOGGER with an Ethernet cable to your own router.
WLAN is not officially supported, yet. Do not use WLAN.
- Changing the interface parameters require a reboot. So click on the
REBOOTbutton on the right upper corner to perform the reboot of the BATLOGGER.- When the interface settings are done correctly, the blue LED should indicate, that the BATLOGGER is connected to the BATLOGGER Connect service after the reboot.
- You can always use the direct local connection and the IP address 169.254.1.16, independently from the interface settings you have configured here.
Set Time Zone
It is important to set the correct time zone so the BATLOGGER can calculate sunset and sunrise time correctly.
Set Location
- It is important to set the correct location so the BATLOGGER can calculate sunset and sunrise time correctly.
- The BATLOGGER cannot determine the location by itself.
- It is much easier to set the location using the BL Connect service.
Set Recording Times
- Set the recording times according to your needs. The BATLOGGER will only record bats during the configured recording times.
- A good starting point is 30min before sunset until 30min after sunrise
Sunrise and sunset times are calculated automatically.
See the ? help to get more hints how to handle this setting with two time frames.
Alias
Set any Alias for your device, to keep it easier for you. For example Measure Mast Matterhorn
Air pressure Value
See the ? on how to set the relative air pressure in hPa.
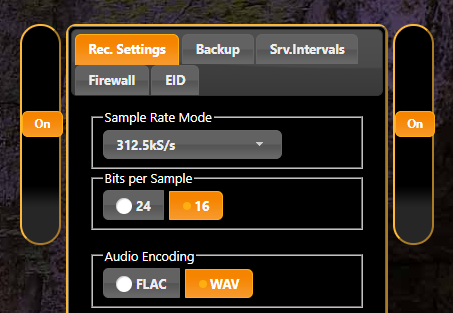
Expert settings
To access additional settings go to EXPERT in the top right corner.
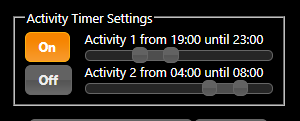
Activity Timer
To save power and ensure that the device is awake at the right moment, please choose the activity times here.
During this time the Batlogger RS X is awake and able to receive communication. If you need the device accessible during your office hours, you need to make sure it’s awake during this time.
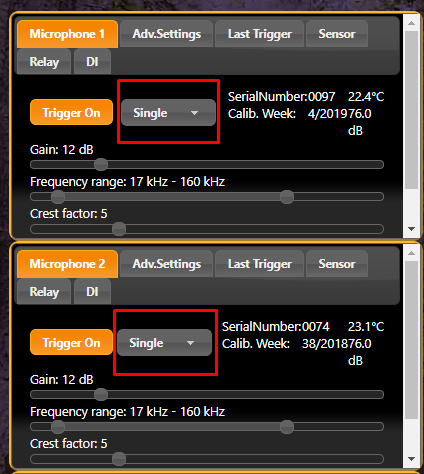
Group microphones
Want to record in stereo?
Group microphones together by changing from Single to a Group.