Commissioning
Warning
Turn the unit off for commissioning/changing the microphone: Make sure that the unit is switched off before connecting a microphone or changing the microphone.
Installation
To connect the components, set the ON switch to the “Off” position.
All status LEDs are off.
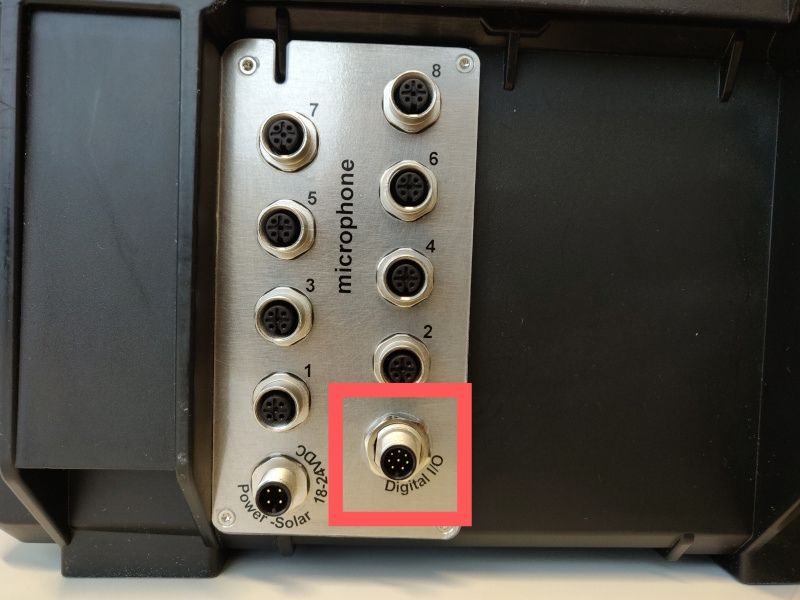
Connect the microphone sensor cable on the back of the unit to the “Microphone 1” input.
If you are connecting more than one microphone, please make sure to connect them in the order of the microphone numbering indicated at the microphone connectors at the back of the BATLOGGER housing.
The „Digital I/O“- plug remains unconnected.
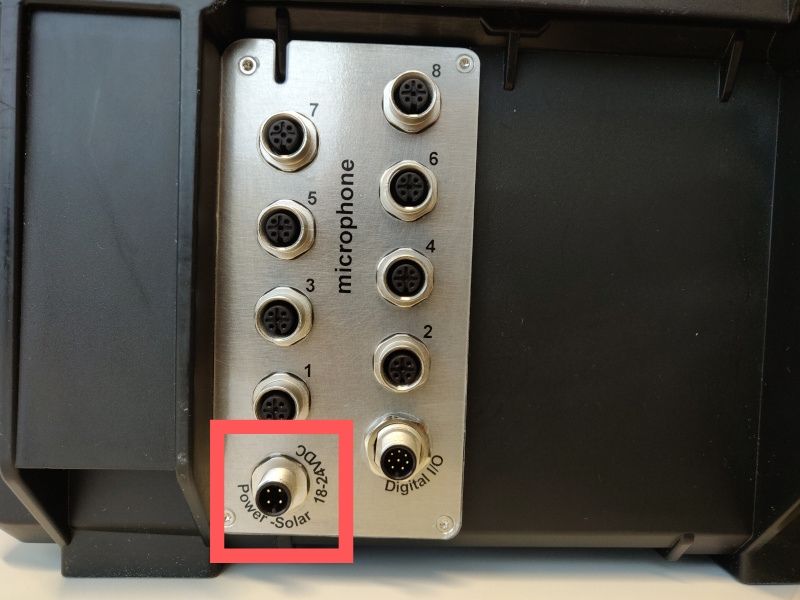
6. Please connect the 24V power supply with the BATLOGGER and the power cable. Connect the power supply with mains power. Make sure that the voltage specifications on the power supply are in line with the voltages provided in your respective country. Alternatively, this connector of the BATLOGGER is used to connect a solar panel. Only a solar panel or the mains supply can be connected at the same time.
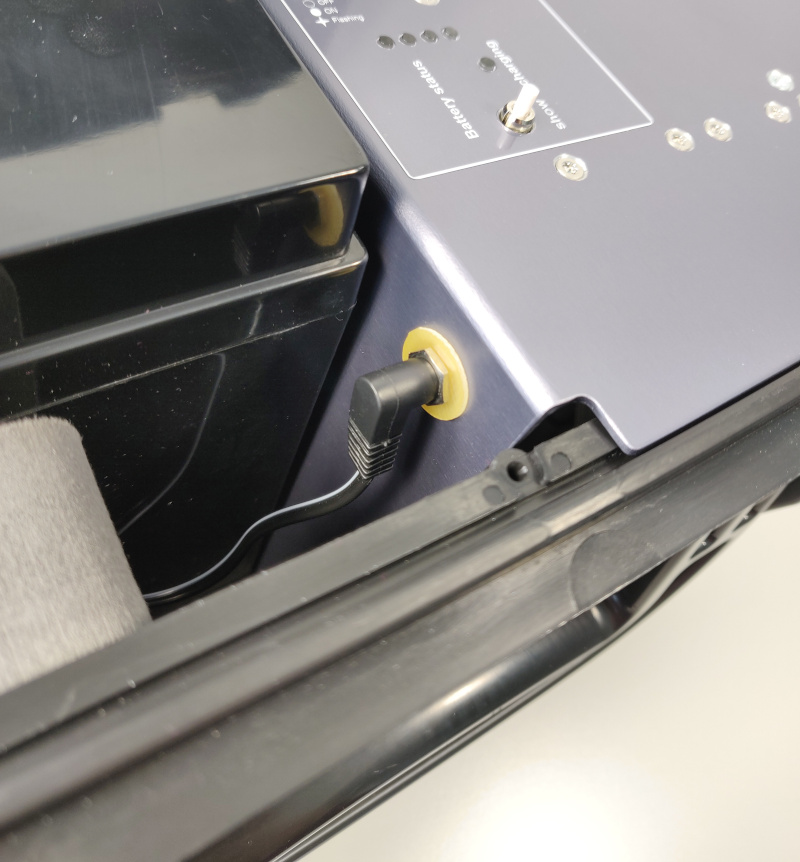
- The large 12V battery is connected with a regular DC-plug to simplify the change of the battery.
Please connect the battery with the BATLOGGER using the DC plug.
The mains power supply will also charge the 12V battery. This is a slowly process and it will take up to 3 days until the battery is filled again. To charge the 12V battery much faster, please remove the battery and use an appropriate external charger
Power-On
- After the installation has been completed, the BATLOGGER may be switched on.
- Please bring the switch “ON/OFF” to the “ON” position.
- The BATLOGGER now boots up which will take a while. The status LEDs are showing some activities during boot-up.
LED indicators during the boot process
- Short flashing of the LEDs after pressing the switch: The power supply has been activated.
- The yellow LED lights up: The device starts.
- The yellow LED goes out and the green LED starts flashing: The device checks if it was started correctly.
- The green LED lights up continuously: The blue LED flashes: The device tries to connect to the Internet.
- The blue LED lights up continuously: The device has established a connection to the Internet.
First commissioning via BATLOGGER Connect
When delivered, the BATLOGGER is equipped with an activated mobile radio connection, which makes it possible to access and configure the BATLOGGER directly via the Internet. To do this, create a customer account with the BATLOGGER Connect Service and then link your BATLOGGER to your customer account.
If you should acquire further BATLOGGER WE devices, you can assign these directly to your customer account, without having to open a new customer account. This way you have all devices in one central location in view.
Follow the insctructions in chapter: The BATLOGGER Connect service.
Status-LEDs
The status LEDs are showing quite a lot of different operating statuses of the BATLOGGER. The green LED and the blue LED are the most important ones for start-up and operation:
Green LED: Operating status
- Blinking
- The BATLOGGER is ON and it is busy (e.g. it is booting up or it is currently writing data to an external hard disk). As long as the green LED is blinking please do not connect or disconnect external USB devices or an SD card. It might lead to inconsistent data on theses devices when disconnection while the green LED is blinking.
- Permanently on
- The BATLOGGER is ON and it is ready. In this state you may connect or disconnect USB devices.
- Permanently off
- The BATLOGGER is OFF.
Blue LED: Connection state to the internet and the BATLOGGER Connect service
- Blinking
- The BATLOGGER has connection to the internet but no connection to the BATLOGGER Connect service (yet). It may take a while, until the connection to the internet and/or the BATLOGGER Connect service is established. So please be patient. If this state is shown permanently, the BATLOGGER might be blocked by a firewall to connect to the BATLOGGER Connect service. Another reason might be, that the BATLOGGER Connect service is currently not running.
- Permanently on
- The BATLOGGER has access to the internet and is connected to the BATLOGGER Connect service. Again: Changes to the connection status might only be indicated with a delay of a couple of minutes. So be patient to interpret the status.
- Permanently off
- No connection to the internet and therefore also no connection to the BATLOGGER connect service (see below for details). Possible reasons: * BATLOGGER is configured for local operation (see below). * BATLOGGER is configured to use internal LTE module: - No SIM or bad SIM pin configured - Wrong APN configured * BATLOGGER is configured to use ETHERNET - Wrong ethernet configuration (DHCP/static addresses, subnet…) * BATLOGGER is configured to use WLAN - This is not fully supported, yet.
Red LED: Power and error status
- Off
- Everything OK.
- Very slow blinking
- Indicates re-charging of the internal battery.
- Fast blinking
- Indicates a system error. The BATLOGGER will try to reboot.
- Always ON and beeping every 10 seconds
- The BATLOGGER runs on internal battery power (fail of external main power).
Orange LED: Boot- and trigger events
This LED indicates boot phases and is indicating trigger events when in operating state.
Ethernet Connector LEDs
The LEDs at the ETHERNET connector indicate the physical connection state of the ETHERNET cable. Usually, the green LED is showing activity and the orange LED is on.